
How to remotely access your EGC StakeBox
If you intend on running your StakeBox as a standalone device in the future without the need for a graphical interface through a HDMI TV/Monitor, then this section will show you how to remotely access your StakeBox.
The Raspberry Pi at the heart of StakeBox has Wi-Fi and Ethernet network capabilities and as such we are able to remotely login to the Raspberry Pi command line from another computer on the same network. First you will need to connect to your local Wi-Fi or Ethernet router.
EGC StakeBox Login Credentials
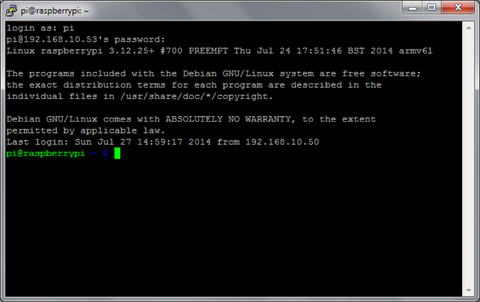
By default when your EGC StakeBox boots up it will ask you to login. Below is the login credentials for the operating system:
Username: pi
Password: raspberry
Connecting to Internet
Before we start working with the EGC wallet we must first make sure that we have an internet connection in order to download the blockchain and start staking. There are currently two options with the EGC StakeBox; firstly you can connect and ethernet cable from your router/switch or you can connect to your local Wi-Fi router using the built-in Wi-Fi.
Wi-Fi
To connect to your wireless router follow these steps:
- In the command line type in the following command to access the Raspberry Pi Configuration menu:
sudo raspi-config- You will see the following menu options. To connect to your Wi-Fi choose option "2 Network Options".

- On the next menu screen choose "N2 Wi-Fi" to configure the Wi-Fi settings.

- Enter your SSID which is the name of your Wi-Fi. It is important that you spell it exactly how it is on your router. Usually you can find the SSID name of your router on the reverse side if the physical router or in the documentation provided.

- Now enter your unique Wi-Fi password to connect to your Wi-Fi and access the internet.

- Once finished go back to the main menu and exit the Raspberry Pi configuration tool by selecting "Finish".

- To confirm that you have successfully connected to your router you can enter the following command: ifconfig , where under "wlan0" you should see next to "inet" and IP address assigned by your router.

To test you have internet you can use the following command, where you should see a successful response:
ping google.com
Ethernet
Ethernet is as simple as connecting an Ethernet cable from your StakeBox to the back of your router, you should see a green light on the Ethernet port on your StakeBox to indicate that it has successfully connected. For Ethernet DHCP settings you will need to refer to your instruction manual for your router.
SSH
Secure shell is a method that allows us to remotely access the command line on your StakeBox. By default, and for security reasons the SSH protocol is disabled to prevent unauthorized access. In order for us to use this method you will need to enable it in the configuration menu.
Enable SSH
To enable SSH you will need to access the Raspberry Pi Configuration Tool, raspi-config can be used in the command line:
-
Enter
sudo raspi-configin a terminal window - Select Interfacing Options

- Navigate to and select SSH

- Choose Yes

- Select OK
- Choose Finish
Alternatively, you can use systemctl to start the service from the terminal window:
sudo systemctl enable sshsudo systemctl start sshYou may have noticed a warning message when you have logged in to the Raspberry Pi stating that the default password has NOT been changed and this is a security risk. To change the default password, you can type the following in the terminal window:
passwd Follow the on-screen prompts to change the password.
Setup your SSH client
You can use SSH client on almost any operating system including the following:
- Linux/Mac OS
- Windows
- iOS
- Android
Linux/Mac OS Client
You can use SSH to connect to your StakeBox from a Linux computer, a Mac, or another StakeBox, without installing additional software, making it much easier to use than other operating systems.
You will need to know your Raspberry Pi's IP address to connect to it. To find this, type ifocnfig wlan0 or ifconfig eth0 from your Raspberry Pi terminal. Next to inet you should see your IP address.

If you are running the StakeBox without a screen (headless), you can also look at the device list on your router. To connect to your StakeBox from a different computer, copy and paste the following command into the terminal window but replace 0.0.0.0 with the IP address of your StakeBox
ssh pi@0.0.0.0If you receive a connection timed out error, it is likely that you have entered the wrong IP address for the Raspberry Pi.
When the connection works you will see a security/authenticity warning. Type yes to continue. You will only see this warning the first time you connect.

In the event your StakeBox has taken the IP address of a device to which your computer has connected before (even if this was on another network), you may be given a warning and asked to clear the record from your list of known devices. You can simply type in the following to clear the device replacing the IP address with that of the StakeBox:
ssh-keygen -R 192.168.0.23Next you will be prompted for the password for the StakeBox login: on Raspbian OS the default password is raspberry, unless you have changed it in the previous section. You should now be able to see the Raspberry Pi OS prompt, which will be identical to the one found on the Raspberry Pi itself when using the graphical interface.

If you have set up another user on your StakeBox, you can connect to it in the same way, replacing the username with your own, e.g. chris@192.168.0.2

You are now connected to the StakeBox remotely, and can execute commands from the command line.
Windows Client
On Windows you will need to download an SSH client. The most commonly used client is called PuTTY, and can be downloaded from greenend.org.uk
Look for putty.exe under the heading for Windows on Intel x86.
- Add your StakeBox as a host
PuTTY does not include an installer package: it is a stand-alone .exe file. When you run it, you will see the configuration screen below:

Type the IP address of your StakeBox into the Host Name field and click the Open button. If nothing happens when you click the Open button, and you eventually see a message saying Network error: Connection timed out, it is likely that you have entered the wrong IP address for the StakeBox.
If you do not know the IP address, type hostname -I in the Raspberry Pi command line.
- Connect
When the connection works you will see the security warning shown below. You can safely ignore it, and click the 'Yes' button. You will only see this warning the first time PuTTY connects to a Raspberry Pi that it has not seen before.

You will now see the usual login prompt. Login with the same username and password you would use on the StakeBox itself. The default login for Raspbian OS is pi with the password raspberry.
You should now have the Raspbian OS prompt, which will be identical to the one found on the StakeBox.
You can type exit to close the PuTTY window.
Give us a tip!
Our learning and blog content is shared and released for free with no adverts ever, guaranteed! If this content helped your project or you just like the work we do and would like to help us grow the content and products we have available, please consider giving us a tip...
BTC: 12ThHKExWZYzLJ7gWSug7CwN5juLEFnpQx
ETH: 0x7323173a7b70e391b82c811af7ebc9ef0d777643
PayPal: Donate with PayPal
Leave a comment